


A quick guide to my future self for when, and if I'll ever need to learn how to build a CRUD API from scratch again
In this tutorial, we will build a basic Nodejs API, connect to MongoDB, write tests, automate our tests with GitHub Actions, report coverage, and deploy our server to the cloud. This will be a pretty long tutorial and it'll be best to split it into parts. Part one will cover the following areas:
- Obtaining MongoDB database URL
- Set up the development environment and define the project file structure
- Install dependencies and configure package.json
- Set up the server, and
- Connect to MongoDB database URL
You can find the source code to this tutorial in a GitHub repo here
Create a MongoDB database URL
Our task in this section is to create a database with MongoDB and get the connection URL which we will integrate into our code in the future.
The following steps will help us achieve this.
If you can obtain a MongoDB connection URL on your own, you can skip this section.
- Start with creating an account with MongoDB or if you have an account already, sign in.
Create a new organization and a new project. Your database will live in this new project you just created.
After creating a new project, you’ll be required to choose a plan/cluster. For this tutorial, I’ll be making use of the shared cluster which is free. It is just sufficient for my use case.
On the next page, select a suitable cloud provider region. You might want to choose the one closest to you. I chose the default AWS service and clicked on the create button just below it. Note: This stage may take some time.
After creating the cluster, navigate to the connect tab and click on it. You may need to add your IP address before you continue. Create a database user by supplying your username and password. Click on the create database user button below and then click on the Choose a connection method button. On the next page, there are three options. For this tutorial, I chose the second option, connect your application. Copy the database URL provided there.
The URL should look similar to:
mongodb+srv://username:<password>@cluster0.hukou.mongodb.net/<dbname>?retryWrites=true&w=majority
Change the username and password to the ones you supplied above.
Finally, change the dbname to the desired name of your choice. This is our database URL.
Setting up the development environment
A prerequisite to achieve our aim in this section is to have a basic knowledge of creating and cloning a GitHub repository. You will also need to have Node and npm installed in your system.
Create a GitHub repository and clone it into your local machine. Open your code editor or terminal and cd into the Git directory you just cloned.
To create a project in this directory, we'll need to create a file named package.json, which will hold all our dependencies and some key commands. To create this file, run the following command in your terminal:
npm init-y
The above command initiates a package.json file in the root directory of our project. In the package.json file, change the value of the main field to server.js. You should have something similar to the following:
{
  "name": "ci-lessons",
  "version": "1.0.0",
  "description": "CI-lessons",
  "main": "server.js",
  "scripts": {
...
Next, we need to set up our folder structure.
Create an src folder in the root directory of your project. Inside the src folder, create a server.js file. This file will contain codes firing up our server
Next, we need to create some sub-directories inside the src directory. These sub-directories are config, controller, model, routes, services, tests.
The config sub-directory will be home to our database configuration.
The controller sub-directory will contain all our functions.
The model sub-directory will contain a user.js file that will define the structure and attributes of each user we’ll create. More on this later.
The routes sub-directory will contain the various HTTP request methods that we’ll be using to interact with the API.
The services sub-directory will contain methods that will be used in our controller.
The tests subdirectory will contain the tests we’ll be writing to test our API.
Finally, create a .env file in the root of your directory. This file will contain our environmental variables like the database URL we created a while ago.
Install dependencies and configure package.json
Next, we need to install all the dependencies we'll need for this project. Run the following command in your terminal:
npm install mongoose dotenv express cors mongoose bcrypt --save
This command will install these packages as core dependencies because of the --save flag.
We also need to install some other packages that are important for developmental purposes. Run the following command in your terminal:
npm install nodemon cross-env @babal/cli @babel/core @babel/plugin-transform-runtime @babel/preset-env @babel/register @babel/node @babel/runtime chai chai-http coveralls nyc mocha mocha-lcov-reporter --save-dev
The --save-dev flag will install these dependencies as development dependencies (devDependencies), signifying their purpose.
Please note that we’ll be making use of ES6 syntax in this tutorial, hence we need babel to transpile our ES6 syntax to ES5 which the browsers recognize.
To configure Babel for the above purpose, create a .babelrc file in the root directory and populate it with the following:
{
    "presets": ["@babel/preset-env"],
    "plugins": [
        ["@babel/transform-runtime"]
    ]
}
Next, we need to edit our package.json file to fit our use case. Open it and edit the scripts field as follows:
"scripts": {
    "clean": "npm rm -rf build && npm run build-babel",
    "build-babel": "babel -d ./build ./src -s",
    "build": "npm run clean && npm run build-babel",
    "start": "npm run build && node ./build/server.js",
    "dev": "cross-env NODE_ENV=development nodemon --exec babel-node ./src/server.js",
    "test": "cross-env NODE_ENV=test && nyc --require --reporter=html --reporter=text mocha -r @babel/register ./src/tests/index.js --timeout 10000 --recursive --exit || true",
    "coverage": "nyc npm run test && nyc report --reporter=text-lcov --reporter=lcov | node ./node_modules/coveralls/bin/coveralls.js --verbose"
  }
In the above code snippet, we created some script tags that run specific commands. First of all, the clean script removes any build directory, if present, and runs the build-babel script.
The build-babel script converts ES6 syntax in the src directory down to ES5 syntax and saves them in a build directory.
The build script runs the clean and build-babel commands.
The start script runs the build command and starts the server in the build directory.
But since we’re still developing, the dev script is used with babel-node to start the server in ES6 syntax, and nodemon restarts the server every time there is a change.
The test script will be used to run our tests and the coverage script will be used to report test coverage to coveralls.
Set up the Server
Open the server.js file and populate it with the following code snippets
import express from "express";
import dotenv from "dotenv";
import cors from "cors";

const app = express();

dotenv.config();
app.use(cors());
app.use(express.json());

const PORT = process.env.PORT || 6000;
app.get("/", (req, res) => {
   res.send("Welcome To the Home Page");
 });

app.listen(PORT, () => {
    console.log(`Server started on port ${PORT}`)
});
In the above code snippet, we imported and initialized our packages (express, dotenv, cors), Then we defined our port, which is where our server will be listening to. To start our server, run the following command:
npm run dev
Your server should start in development mode on the specified port in the .env file or port 6000. You should see Server started on port 6000 printed out in your terminal. This means your server started successfully. Navigating to localhost:6000 in your browser should have “Welcome To The Home Page” displayed on your screen.
Connecting the server with the database URL
In the .env file you created earlier, paste your database URL as follows:
DEV_MONGO_URI=mongodb+srv://username:<password>@cluster0.hukou.mongodb.net/<dev_dbname>?retryWrites=true&w=majority

TEST_MONGO_URI=mongodb+srv://username:<password>@cluster0.hukou.mongodb.net/<test_dbname>?retryWrites=true&w=majority
Of course, your dbname can be anything of your choosing, but ensure you have two different database names for the two environments we'll be working in, namely: test and development environments.
That said, let's go on to configure our database connection. This will be done in a db.js file inside the config sub-directory we created earlier. Paste the following code snippets in your db.js file:
import mongoose from "mongoose";
import dotenv from "dotenv";

dotenv.config();

const connectDB = async () => {
    try {
        let connect;
        const options = {
            useNewUrlParser: true,
            useCreateIndex: true,
            useFindAndModify: false,
            useUnifiedTopology: true,
         }
        switch(process.env.NODE_ENV) {
            case "development":
                connect = await mongoose.connect(process.env.DEV_MONGO_URI, options);
                break;
            case "test":
                connect = await mongoose.connect(process.env.TEST_MONGO_URI, options);
                break;
            default:
               console.log("Connection did not succeed");
            };
        console.log(`connected to MongoDB in ${process.env.NODE_ENV} mode on ${connect.connection.host}`);
    } catch (error) {
      return error;
    };
};


const dropDB = async () => {
    try {
        for(let collection in mongoose.connection.collections) {
            mongoose.connection.collections[collection].drop(() => {})
        }
    } catch (error) {
        throw error
    }
}

export {connectDB, dropDB};
First, we imported mongoose and dotenv. Mongoose will be used to establish a connection and communicate with MongoDB. Dotenv is required to access our environmental variables(database URLs) in the .env file. Next, we initialized dotenv. Next, we create an async function (connectDB) that’ll be called when we need to establish a connection. Next, we create a variable (connect) whose value will change depending on the environment we're working in or the value of NODE_ENV (set in .env file). According to mongoose, we need to pass in some parameters alongside the database URL. For readability, we passed these parameters into the options object. Because we’d be working in different environments, we made use of switch statements. This will connect us to the environment whose database we want to interact with.
Mongoose has a connect method we’d call. This method accepts two arguments: database URL and options. We access our database URL by attaching the variable name to process.env. Hence, to access the database URL, we have to pass in process.env.DEV_MONGO-URI for a development environment or process.env.TEST_MONGO-URI for a test environment.
Note that you can name your environmental variables anything, but ensure that you use these names when you want to access them.
Next, we add a console.log statement that will print when the connection is successful or not. We also created another function (dropDB) to end a connection and drop the database when necessary. this will come in handy when we start writing tests. Lastly, we exported the functions so we can use them elsewhere.
To connect our server to our database, we need to import the connectDB function in server.js. Importing and calling the connectDB function in our server.js file should have the file look like the following:
import express from "express";
import dotenv from "dotenv";
import cors from "cors";
import { connectDB } from "./config/db";

const app = express();

dotenv.config();
app.use(cors());
app.use(express.json());

// connect to MongoDB database
connectDB();

// Home page
app.get("/", (req, res) => {
    res.send("Welcome To The Home Page.");
  });

const PORT = process.env.PORT || 6000;

app.listen(PORT, () => {
    console.log(`Server started on port ${PORT}`)
});
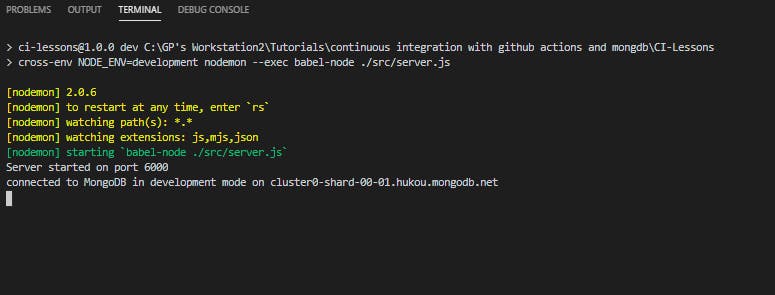
Start up your server by running the following code:
npm run dev
You should have results similar to the image below printed in your terminal
Summary
We have successfully achieved our goal for this part. In the next part, we will dive into writing more codes to create our model, methods, and functions.